As nice as a pit of gravel looks, I do have loftier plans for the rain garden. In the short time since I dug the trench, deluges of rain have already eroded meandering rivulets through the lawn as it slopes towards the neighbor’s yard. This, I note, will need to be addressed long-term, as looking outside I can see that his yard is flooded (although I don’t think I’m the sole cause of it). Amusingly, as if through divine grace, the pond which has collected thoroughly respects the property delineation, defying the normal expectations of water as there doesn’t seem to be much variation in elevation back there. Surely it’s some form of retribution for his throwing fireplace ashes onto my side, or because his kids use my yard as a highway (see the first post of this project). Thank you, universe.
It is for these two reasons: aesthetics and drainage, that I intend to plant things in this rain garden. But what? I could consult my family and their collective expanse of natural science degrees, or I could needlessly peruse the opinions of those whose experience and education level I have no way of verifying. Surely the latter was the better option.
It’s like a dandelion, only cooler
But first, let’s revisit an earlier time, when we had first purchased the property. Being the former home of an elderly woman, the yard and gardens were somewhat neglected. Well, they still are, but I’m getting to it. Anyway, the gardens immediately adjacent to the house and deck were hastily made presentable for showing by someone throwing down inches of mulch. I’m not even certain there were gardens, as every time I dig in one of them I hit concrete and bricks. Three things survived this onslaught of woody biomass: a series of yew bushes, nightshade, and some mystery ugly woody plant that I figured for a weed. I’ve since then ripped out all the nightshade for obvious reasons, once my daughter exclaimed in delight that there were miniature tomatoes growing (however taxonomically accurate–her extended family would be proud). But I didn’t get around to the woody plant. Then winter came and it went to seed. It produced these very interesting looking pods, which my wife harvested and brought inside, mentioning a future arts and crafts project.
Fast-forward back to the present. Ultimately I decided native plants would be the hardiest, and I also wanted plants that would double for a butterfly garden. And what do monarch butterflies like? Milkweed of course, and there it was on the list of native plants appropriate for water gardens. And, my sister had included it in her doomsday gift to me–I mean birthday. It’s a cool gift, though it does kind of looks like the starter kit to a seed vault in my basement (20 different strains of squash, for example). Family was always very important to her, and here she is looking after me for a future apocalypse. They’re also meticulously labeled, consistent with the strain of OCD that plagues our genes (I’ve since catalogued all the seeds in a spreadsheet).
And so, with all the dramatic flair that one can assign to the task of dropping a few seeds into a pot of dirt, I dropped a few of the seeds into a pot of dirt. The next day I was browsing the internet instead of working and I caught a glimpse of an image of a milkweed plant. Specifically, I saw a milkweed seed pod and thought how familiar it looked. It wasn’t until later in the day that I realized the seed pods my wife had harvested were milkweed–the pods which I had ended up moving to the shelf on top of my indoor grow lights, right next to the box of all the seeds my sister gave me.
Milkweed in the winter
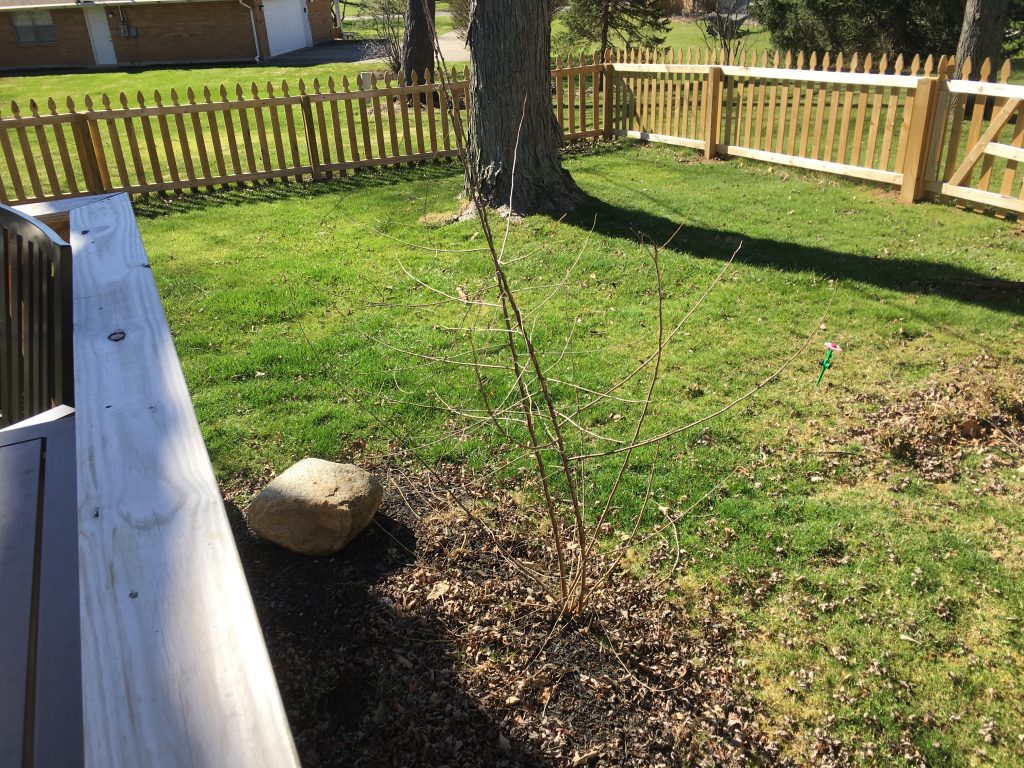
Now I debate: was that weed in the garden really as ugly as I remember? It’s only a stick right now so I can’t tell. But it seems pointless to plant milkweed when I already have it growing. Maybe I’ll transplant some jewelweed instead.
WiFi sucks. I mean, it’s awesome, in theory, but it kinda sucks, though I can’t think of an appropriate metaphor to explain why. Let’s say, it’s trying to take a drink from a sprinkler when a crowd of people are all gathered around it and fighting. Now let’s compare that to, say, a water tower, where everyone in that same crowd gets their own spigot. Everyone attaches a hose, and everyone’s happy. This latter explanation is wired Ethernet.
Okay, that was a horrible explanation, and I hate analogies. Analogies are a means to add context to an explanation when parties involved don’t have the prerequisite knowledge, but they always end up sounding like a twisted politician’s manipulative words. Anyway, as with all technical explanations, there is no shortage of people on the Internet who can explain this better, so go Google the background information if you need. As usual, my post is anecdotal, because, overly-researching a project adds to the complexity, which tends to dissuade me from even attempting it. So instead, I will simply tell you that the following project is reasonably straightforward and even an amateurish attempt will reap huge benefits.
With WiFi, you have a much more restrictive set amount of bandwidth, and that bandwidth is shared by all devices on that particular hotspot. But wait–it gets better. That hotspot is also sharing that particular range of radio spectrum with every other hotspot in range, and any other device licensed to operate within that spectrum, which is just about every wireless consumer appliance. So in practice, the general throughput you could ever hope to achieve with a hotspot is roughly a third of the theoretical maximum. 1300 Mbps? More like 450.
A pretty commercial hotspot
Also, ironically, the main point of using WiFi is for mobility, and a major problem with WiFi is in its mobility. When the connected device moves, it experiences latency. When the device switches between hotspots on the same network, there’s a delay while it renegotiates a connection. In my house, in order to cover the property in its entirety, I have 3 hotspots. Adding to the complexity is the changing technology, while maintaining legacy support, so I have 802.11b-ac, on both 2.4GHz and 5GHz bands. And, while this is all done transparently, it still experiences delays. There are commercial products that claim to handle the transition better, as do consumer “mesh” WiFi products, and I’m sure they do, but you pay for it, and for consumer use I just don’t yet find the price point cost-effective.
Additionally, mobile devices also connect to cellular data service. That means, when roaming between hotspots, the device also has to to consider whether it’s going to connect to a new hotspot, or the cellular service. Quite often I walk from my living room to the garage, go to load a podcast, and the phone says something like this:
‘Oh, we’re walking out of range of that hotspot now, guess I’ll switch to cellular, hang on a sec. Oh wait! There’s another hotspot here, but I already started negotiating an IP from the cellular network. Okay, hang on a sec, I’ll connect to this other hotspot.’
Of course, this takes only seconds, but that’s enough of an irritation when in the middle of loading something to rouse ire. Plus, in my house, whenever the Internet isn’t immediately accessible for whatever reason, it’s my fault. Worse is when the connection drops while already involved in something. I pray every time my wife loads up a Destiny raid that the connection remains stable.
And sometimes, when a device boots or wakes from sleep, it can stall while deciding on where to connect. Such was the case with the Apple TV in our bedroom. So after months of dropped connections, despite having installed a new hotspot 10 feet away, I did what I had been gradually doing throughout the house: I installed an Ethernet jack.
And this is where one would ask: “Simon, aren’t there hundreds of online guides from people with far more experience than you on how to do this?” And I would answer yes, there most certainly are. But unlike those people, this type of work is not relevant to my career, so the observations I offer are free of prejudice, as they represent no meaning to my ego. So, no lengthy arguments here about industry standards. If that’s what you’re after, shoo.
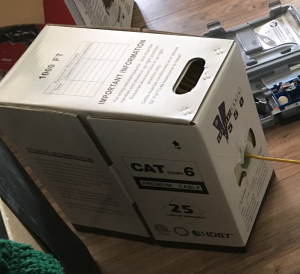
Let us begin. I will explain what I did and why. First, I acquired a 1000 ft box of CAT6, UTP, CMR, solid core Ethernet cable. Here is why I chose this:
1000 feet is a standard unit to purchase, easy to find, and economical in price. It seemed like a good place to start, based on my estimates.
CAT6 is the most recent official rating for Ethernet cable. The price difference for the quantity I was purchasing was negligible, so logic dictated that I buy the more modern cable.
UTP. This means it’s unshielded twisted pair. Technically, all Ethernet cable is twisted pair, so whatever (phone lines are twisted pair, so the tech is old, although whoever installed the land lines in my house just draped individual pairs of wire willy-nilly through the basement–that couldn’t have been very good audio fidelity). As for the shielding, well, that’s usually reserved for niche applications. I didn’t even see shielded wire available during my search.
This cable has no idea how much data it’s going to carry
CMR. This is the rating on the insulation. It means it’s rated for riser applications, so safe to run up through dead space into walls. The rating is for fire-retardant purposes. Plenum wire is designed for air ducts. For residential applications, I wasn’t concerned. If the basement is on fire to the point that the wires are burning, I’ll have bigger problems than how quickly the fire will eat through the wire. Google is your friend if you want the details.
Solid core wire is the standard for Ethernet runs. Banded wire is used for patch cables. Basically, wire that doesn’t move should be solid, and wire that connects devices to jacks should be banded. Solid can break from repeated bending, apparently. I didn’t discover this until I had already crimped patch wires for every wired device. I suppose time will tell if this was a bad idea or not. But if wires break, I can always buy new.
There, that’s settled. There is no reason to further discuss wire types.
Running the wire was straightforward, and the boxes are designed for easy spooling. Simply place the box at one end of the run and pull it as needed. This comes up a lot so I’ll mention it: use no more than 25 pounds of pulling force. I suppose this means that everyone has a very accurate sense of quantifying force? I guess just avoid using it to swing like a monkey from the rafters and you should be good.
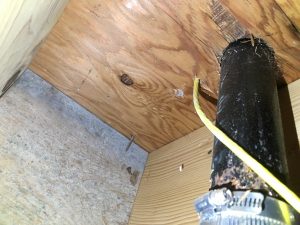
Stupid support beam
I found CAT6 passes easily through a 3/8 inch opening, so drilling is pretty simple. I also live in a ranch with a full basement, so all I had to do was measure carefully, then drill up into the wall-space from below. I can’t imagine how difficult it must be to fish this stuff through multiple stories of drywall. You’ll see in the photo where I hit the damn support beam and had to re-drill. Also the drill battery died and I had to borrow the neighbor’s. Why is a project never simple?
Once through, I drilled a rectangular hole for the box with a Dremel. CAT6 is also stiff enough that I was able to simply reach into the wall space with a hook and pull the wire out.
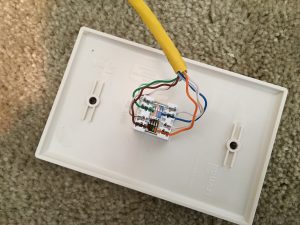
Don’t do it this way
The next step was to punch down the wires into the jack. This was wonderfully simple–just follow the supplied instructions and use the included tool. Choose either the A or B configuration. Apparently B is the US standard, but A has minor advantages over B. Since I was wiring everything myself, I figured I’d go with A then. The important thing is to stick with either A or B once you start. Also, I discovered later that you’ll want to leave the wires twisted as much as possible, and that the wires are supposed to feed from the inside of the jack punches to the outside, not the other way around as I did in the photo. Maybe one day I’ll re-punch properly, but the line tested at 780+ Mbs, and seeing as the Apple TV only has a fast Ethernet NIC (100 Mbs maximum), there seemed little point to fuss over technique.
The other end was then terminated at the router. For simplicity, I just crimped it down into an RJ45 plug, though maybe one day I’ll get a proper patch panel installed.
Final notes:
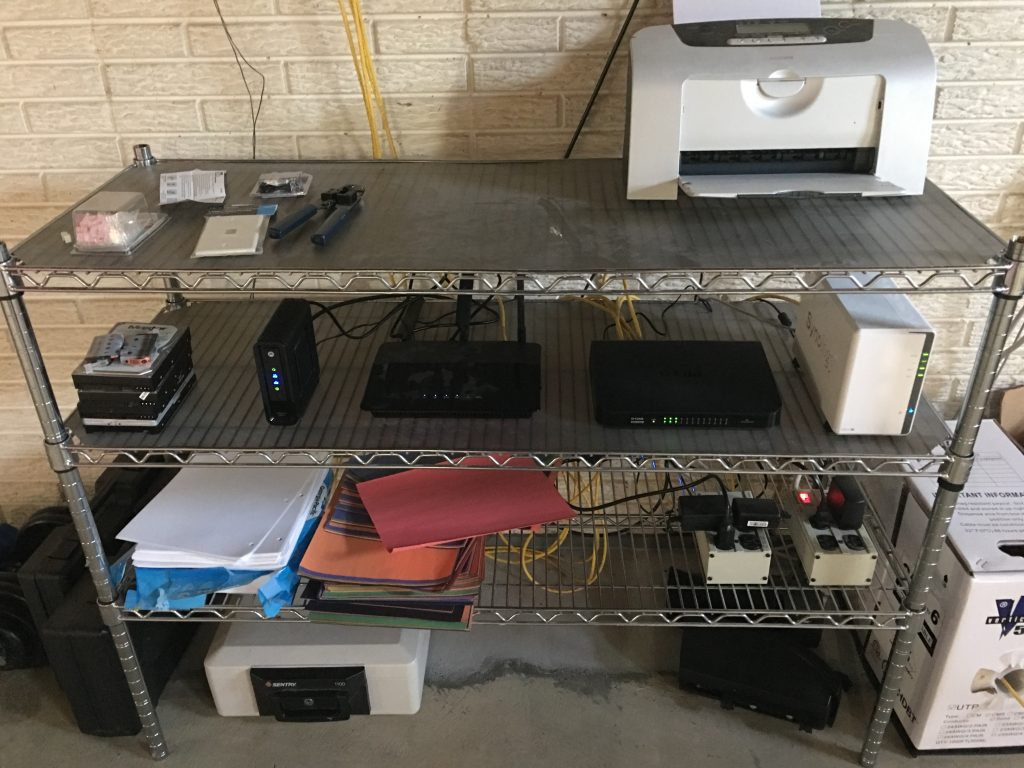
If possible, use a dedicated Ethernet switch, rather than the router’s internal switch. Chances are the router’s switch doesn’t have as much resources dedicated to the switch part. Also, I was going to run out of ports anyway.
Every time the connection hops between devices, you lose throughput. I opted to only run a single wire to each drop, and then connect another switch to give me the ports I needed. Professional installations use one main switch and run however many wires are needed to each drop. I didn’t want to drill that many holes, or deal with that much wire. But the consequence was that my 760 Mbs connection dropped to a little more than 450 when I tested a file copy to the NAS, which sent the signal through 2 switches. Offhand it looks like you lose half of the throughput for each jump, but that’s only based off of two hops so I don’t know how that actually scales. Still, each device is guaranteed that much static bandwidth, and half a gig isn’t too shabby.
My aspiring data center
Despite the drawbacks, the connections are solid. I’ve even taking to plugging my work laptop into the Ethernet to speed up the VPN, with much success. And besides, all this tech does look damn cool.
I realize now that my attempt for a humorous title renders continuations of that original article incongruous with the actual content. But, it’s too late to change now.
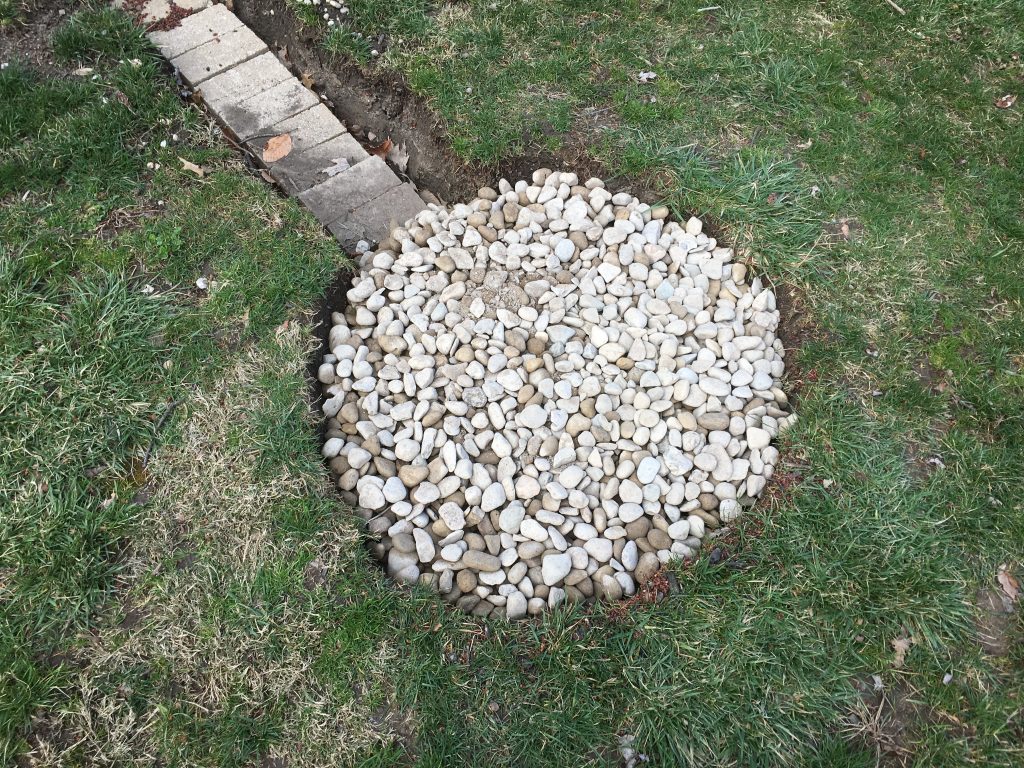
My mudpit had finally dried (after the last rain, drained within 7 days, so safe against mosquitoes), and with the weekend’s temperature once again bearable, and with the arrival of Lowe’s gift cards (courtesy of Bank of America), I proceeded to phase 2 of the rain garden: filling the pit with river stone.
The intent was to replicate the drainage trench in the front yard, with small stones as fill and larger stones as a lining. But upon arrival at said hardware store, I discovered a critical rock shortage in the diameter range upon which I had decided. There were 3 stories of pallets filled with large stones, but only 3 remaining bags of my desired size–all busted. Irritated, I paced the isle, occasionally returning my gaze to the shelves of merchandise, thinking that when I looked one more time, they would be there, me having simply been unobservant (it’s happened quite frequently before).
My daughter then approached and asked why I was standing motionless, staring at the rocks. Upon answering, she then asked what was wrong with the other rocks. I explained that they weren’t the right size. She asked why I couldn’t use them anyway. I responded tersely that I couldn’t use them because they were the wrong size. The discussion repeated itself as one would expect it to, her being a 5-year old.
At this point, my wife approached. I explained, dismayed, that they were out of rocks of the size we needed. After a few moments of reviewing the pallets, she concluded too that they were out of the desired size, validating my assessment of the merchandise, for which I was thankful, because it’s irritating when I look past something multiple times only to have someone else point it out to me.
A moment later she asked could we not just use the larger rocks for the project. I interjected that we could not, as they were the wrong size. She then asked why that mattered. I considered momentarily, then responded that they were the wrong size, and iterated something to the effect that I wanted stone homogeneity across the drainage projects. She made the point that this was for the back yard, and therefore didn’t need to be consistent with the front yard’s stones. I then replied that these stones were unworthy, not conforming to the great Aryan stones we had in our land!
She left to go look at trees, abandoning me once again to the great stone dilemma. She was right though, it really didn’t matter, at least in terms of function and appearance. Appealing to my gnawing OCD however, it would never do. But, I said I would do this project that weekend, and an honor-bound promise to myself won out over OCD. I went to get a utility cart.
Upon returning, I passed my wife at the trees. She inquired as to how many bags I was getting. Considering, I concluded that I had no idea how many I would need. She estimated 6 for the hole, and I figured about 10 for the project. If nothing else, they’d probably be used for something else later, so 10 it was.
I returned to the rocks and began loading, cognizant of the fact that 2 stories of rock pallets sat above me, 50 pounds per bag (I’m guessing–why do bags of rocks list cubic footage but not weight?), ~100 bags per pallet, that’s…5000 pounds per pallet, with 2 pallets immediately above me as I crawled under the metal shelves to retrieve rocks from the ground-level section. Yep–that would kill me.
50-pound bag at a time, I loaded 8, then paused. Our means of conveyance was a 4-cyllinder 160HP Honda Accord. I had just loaded 400 pounds of rocks onto a cart. I grunted as I pulled the ancient rusty device, shooing my daughter away as she insisted on helping with the task. I recalled the car’s manual saying it could pull a trailer, although one of the lesser tonnage classes. But that didn’t say what the suspension of the vehicle could handle. So I chickened out at 8 bags. I loaded the trunk at the garden center entrance, watching as the vehicle sagged a little more with each bag. But it held, and we completed the journey home without snapping a ball joint.
Once home, I carried the bags one by one to the pit. I opened the first bag and dumped the contents, which now looked like a paltry sum of rocks. A half cubic foot of rocks didn’t go far, and after the eighth bag, filled the pit almost full. But there were none left for the trench, so next week, back I go for another 8 bags.
Our house is neighboring the house on the corner. On the perpendicular road from this intersection, one house down from this same house, is a house filled with feral children. These children, in their angst to visit the park, save precious moments by bypassing the intersection altogether and instead blaze a trail through my backyard, driveway, and front yard.
As any self-respecting old man suburban homeowner would do, I’ve conspired in secret to find subtle ways of mitigating the problem. I laughed evilly to myself as I fantasized over hedgerows of blackberries and poison ivy. But these are mere irritations. What I needed was something extreme: Unnecessary escalation to get my point across.
So I pondered the archives of knowledge I spent years of college acquiring–knowledge others have since called useless. I scoff at their uneducated masses of business degrees.
Not on my watch
A vision of Romans and Gauls flashed through my mind, and I recounted the Battle of Alesia–the first major battle to earn the booby-trap notoriety. Introducing, the Lilly. Interestingly, Googling the Lilly Trap returned an odd amount of pornographic images. I perused the thumbnails for a few minutes out of sheer curiosity before returning to my writing, naturally. My point is, I have no appropriate visual aid to append to this paragraph, so I will describe:
It’s a trap!
The Lilly Trap was a small pit with a sharpened stick in the center. The stick was deeply secured, and the pit was either covered with brush or filled with water. The idea was to hide the trap, so that an unlucky infantryman would step upon it, impale his foot on the stick, and be subsequently immobilized. Yes, this would subtly get my point across, muahaha. I began digging.
Okay, enough of that. This is the part where I tell you that maiming children is not my objective, although chasing them away with a 20 gauge certainly has crossed my mind. But I had other problems to contend with, namely the drainage situation from the downspouts.
The prior owner had installed extensive waterproofing measures in the basement. The perimeter had been trenched, and a sump pump installed. And when we were viewing the house, there had indeed been water in the sump. But, that was the last time it’s ever held water.
Shortly after moving in, it became obvious that the problem lied in the rainwater’s current drainage paths. Downspouts, dutifully installed, channeled their contents directly against the house. These areas had not been graded, so the water simply sat against the foundation. After the first heavy rain, I deduced something was amiss when I saw the house adjacent to several small ponds. That, I cleverly declared to myself, holding an authoritative finger of pronouncement to the sky, was not right.
So I began trenching. But the problem with this particular corner was that the grade went up before down. So in order to get the water away from the house, I’d have a very deep trench. Also, the remnants of a stump were between the downspout and the far side of the rise, and I was not keen on chopping through many feet of roots.
Introducing, the water garden. I would trench as far as possible, then dig a deep hole, fill it with permeable material, and surround it with plants that tolerate flood/drought cycles. The cold weather broke and we were blessed with a beautiful weekend.
And sure enough, I started hitting roots, so I ended the trench in said deep hole. I lined the trench with bricks to provide a solid bottom, then planned to fill the remaining trench and hole with river stone, as I had on the drainage trench in the front yard. Then it got really cold again, and we were hit with our first spring storm that flooded the project.
So good news: the water goes where it’s supposed to now and doesn’t pool near the house. When the hole filled with water, it overflowed down the hill and away from the house. Success!
Unfortunately, now the rain garden is a hole of muddy water almost two feet deep. But, I have appeased the laws of hydrodynamics, and hopefully in the meantime I’m frightening the children away with my bizarre hole-digging project. Next step: caltrops!
It’s a question as old as alcohol itself: “The aesthetics of this drink are pleasing, but the cloudiness of the ice is juxtaposed to the refractive index of the crystal vessel.” I’m fairly certain those were the words used.
Historical interpretations aside, the question has been asked before. “How do I make clear ice?” I know this because a quick internet search revealed this dilemma to be ubiquitous. It is the natural progression in drinking: Discovery –> Refining tastes –> Enhancing the function of vessels –> Presentation/Aesthetics. Each stage in the discovery is dependent on its predecessor. Alcohol must be discovered before one can develop personal taste. A refinement of taste is required before the functionally enhancing aspects of the vessel can be appreciated. And ultimately the primary and secondary purposes of alcohol, namely its inebriating and tasty qualities, must be acquired before the ultimate tertiary properties of aesthetics can be applied.
As an experienced drinker (or depending on who you ask: functioning alcoholic), I have long since advanced upon this hierarchy of needs. Having mastered the art of garnishes, and having acquired a respectable quantity of crystal bar-ware, one point of concern remained.
So, as with all of life’s great mysteries, I immediately started a journey through the Internet. The Holy Oracle, i.e. Google, referred me to numerous blogs and forums which attempted to address this glaring deficiency in mixology.
As a side note, I wanted to jest a moment on the nature of Internet forums. After the golden age of the Internet’s nubile novelty and innocence, its inevitable ubiquity brought with it the general trash of humanity. Trolls. But after the tipping point, when the Internet became universal, when more forums entered existence than could be discovered in a lifetime, well, trolls tend to gravitate towards the larger masses of Internet presences to achieve maximum effect. That is, the more esoteric the discussion, the more decreased the likelihood that a troll will crawl out of the filth to infect the core of knowledge. While I only found limited information on the way of ice and its translucency, there definitely weren’t any trolls in those discussions.
But back to the problem at hand. I compiled a list of repetitious advice:
Use distilled water
Freeze slowly
Use hot water
Use boiled water
Use twice-boiled water
Freeze in large blocks
After thorough testing, most of these were either nonsense or had no measurable impact. I will elaborate:
Use distilled water More importantly, use relatively clean water. The focus here is to reduce dissolved impurities, so the quality of local tap water is paramount. If it’s very bad, then yes, I suppose distilled would net obvious improvements.
Freeze slowly Nonsense, and not worth the effort.
Use hot water Bingo! Hot water of course holds fewer dissolved gasses, which are the primary cause of cloudiness.
Use boiled water The temperature hits a point of diminishing returns. Any variations above say 130 degrees were negligible. And if the water is too hot it’s just dangerous to handle, and it can melt plastic.
Use twice-boiled water I’m not sure what the logic on this one is. Maybe it purges any gasses not purged the first time? I’m sure someone with more knowledge in chemistry/physics could explain this theory, but in practice it’s negligible.
Freeze in large blocks Also bingo! The volume allows the trapped air to congregate as the ice freezes inward, leaving the periphery devoid of air. [Edit 2017.4.28: Leave the water sit out for 20 minutes before placing in freezer. This will allow it to offgas more before ice traps the air, without allowing so much time that the cooling water absorbs more gas]
Conclusion: reduce the total amount of dissolved gas by heating the water, then freeze the water in a volume large enough that the amount of remaining dissolved gas isn’t noticeable at the edge of the resultant ice. This second part–the volume–is open to experimentation. I’ve tried various volumes and container shapes with wildly different and inconsistent results. I will say that long and flat Tupperware seems to work better. Maybe it’s the increased surface area of exposed water.
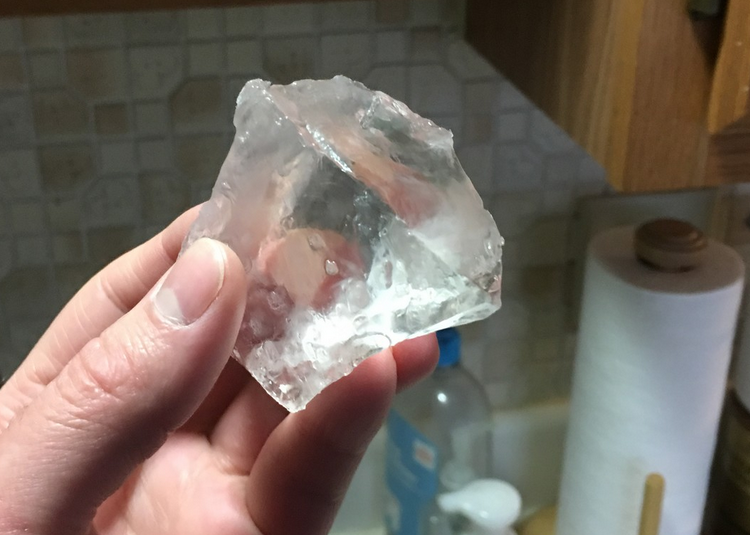
One problem remains–how to separate the clear ice from the cloudy. I found the solution lay, as it often does, in violence and needless waste. A hammer and old steak knife chipped the ice into manageable chunks, and a running faucet of hot water could melt the cloudy ice off the clear. Is the latter wasteful? Yes. But…the cost of perfection always leaves casualties in its wake. Besides, look at this:
Also, the clear ice melts slower, so bonus. Your guests might not appreciate it, but there will be no argument on your pretentiousness. Toast yourself on having achieved drinking self-actualization.


 gathered around it and fighting. Now let’s compare that to, say, a water tower, where everyone in that same crowd gets their own spigot. Everyone attaches a hose, and everyone’s happy. This latter explanation is wired Ethernet.


 Introducing, the water garden. I would trench as far as possible, then dig a deep hole, fill it with permeable material, and surround it with plants that tolerate flood/drought cycles. The cold weather broke and we were blessed with a beautiful weekend.