Standards

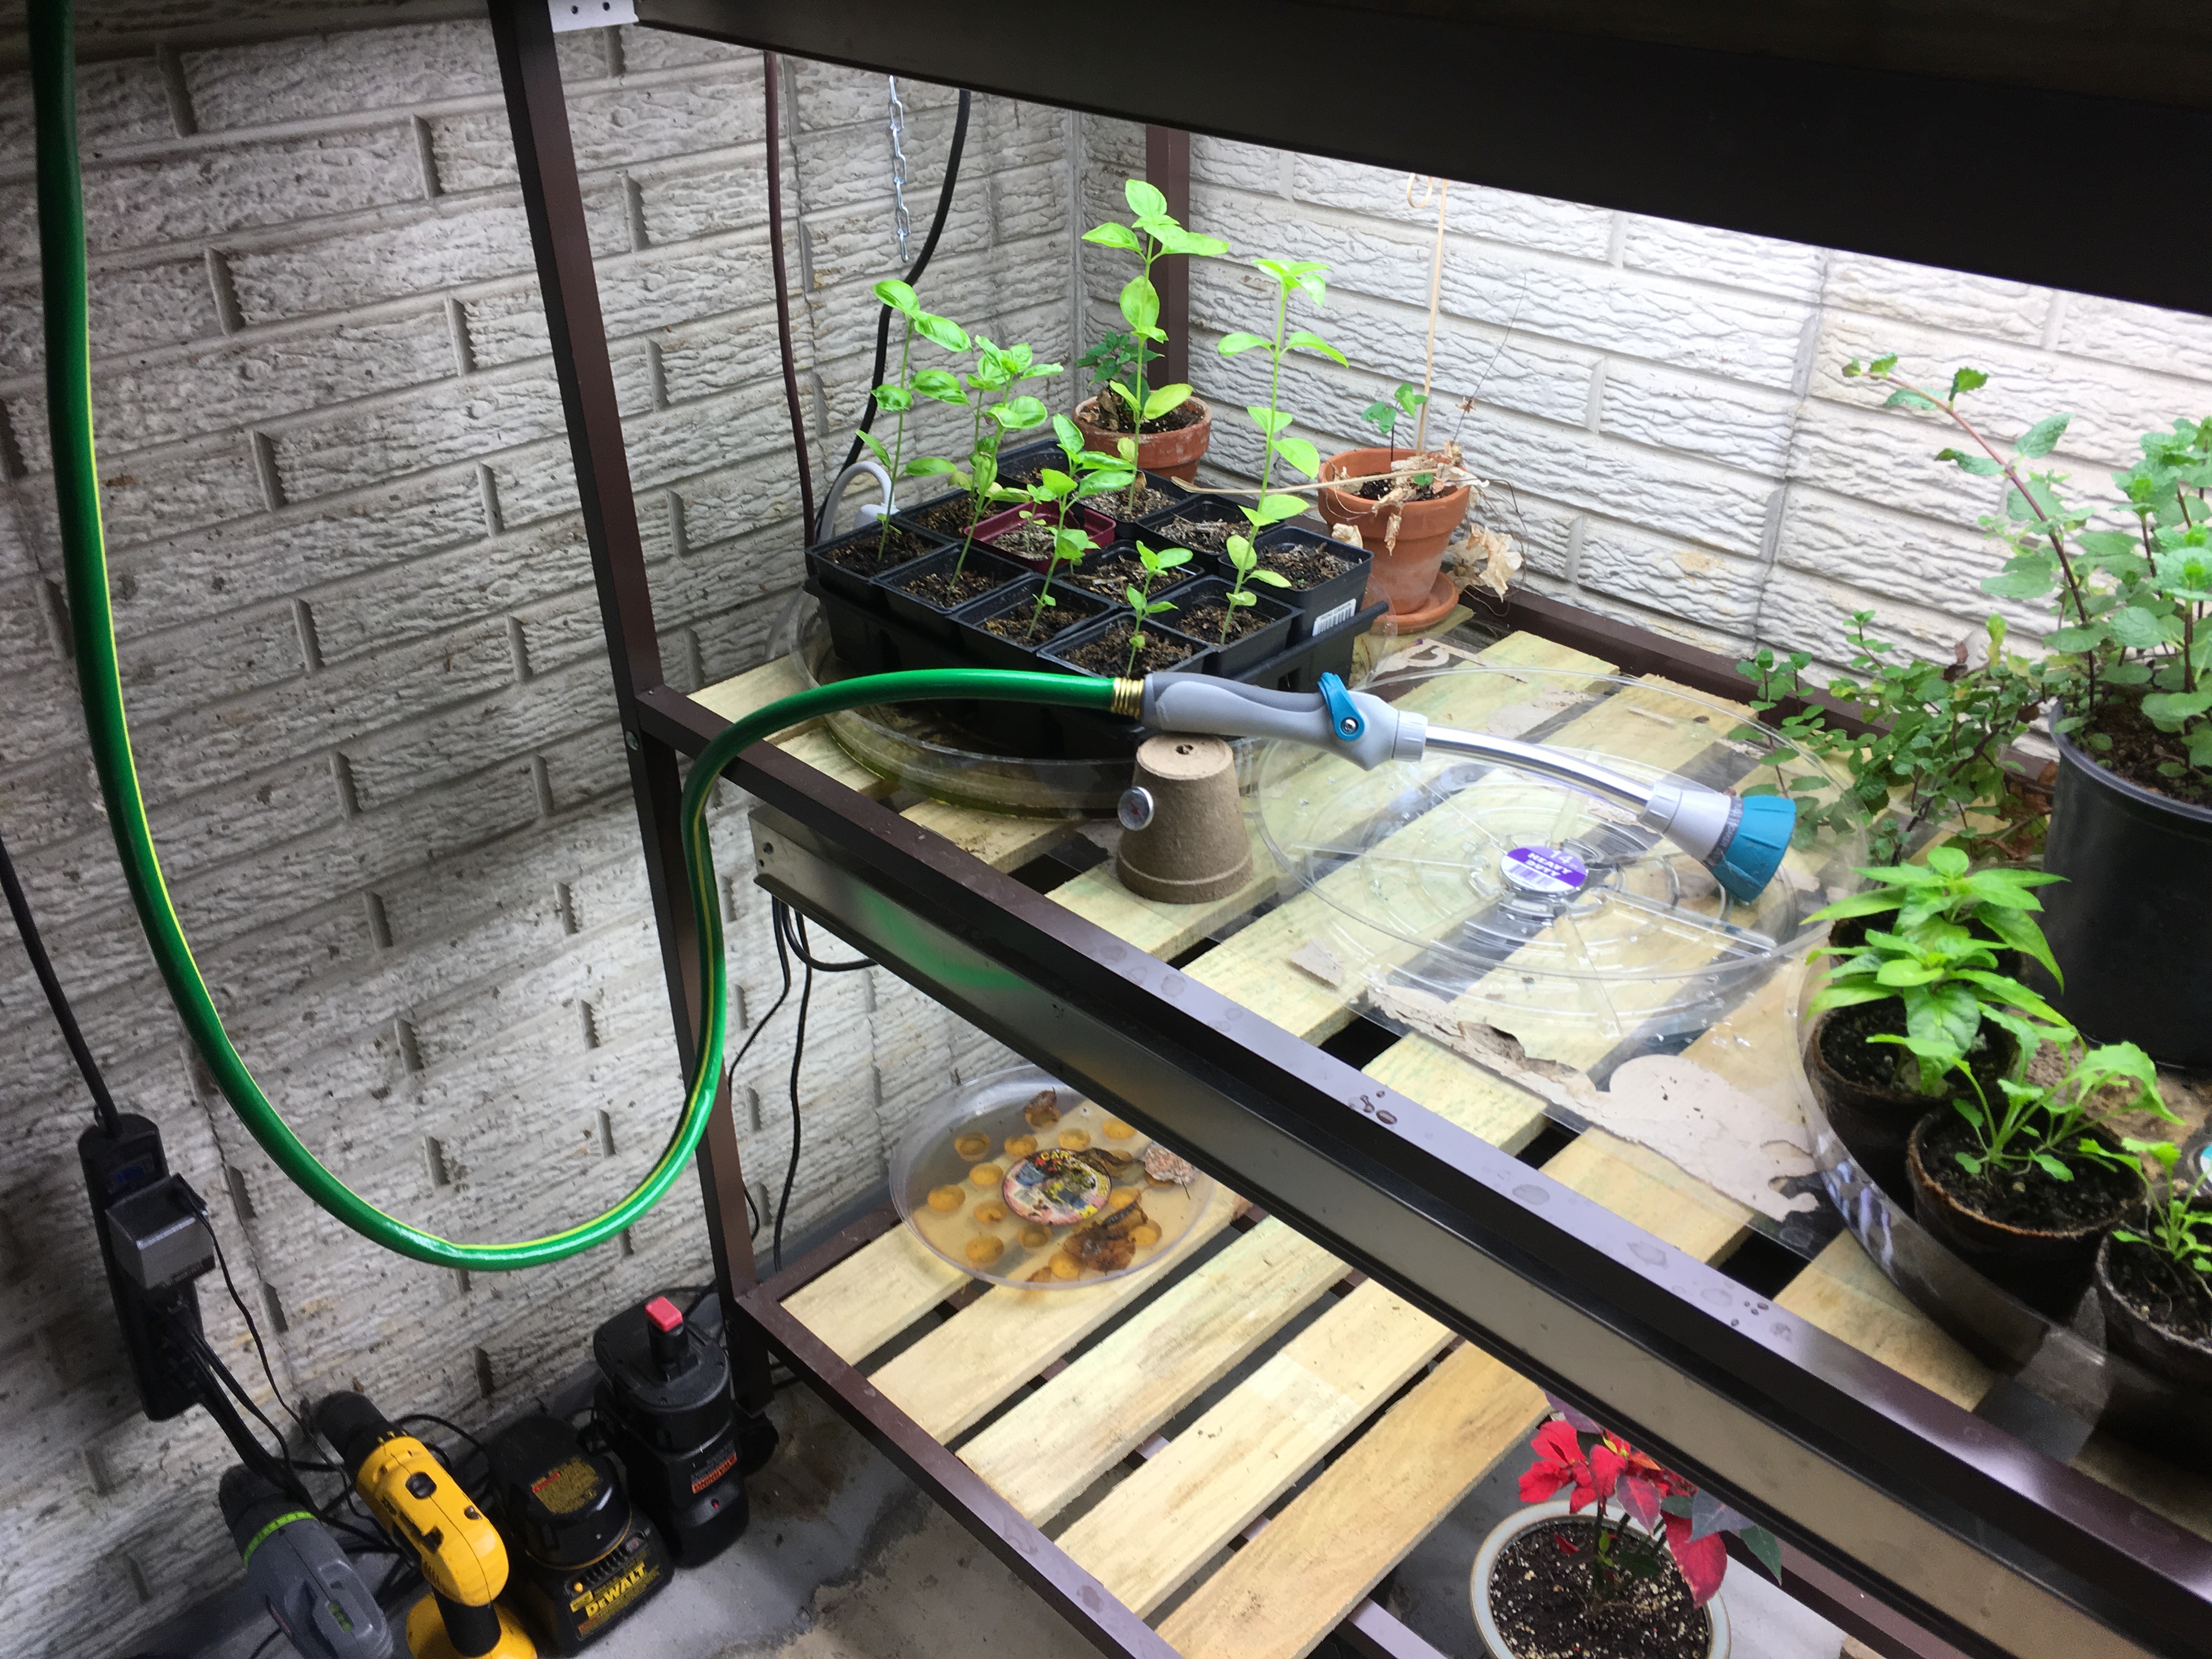
I really like my indoor grow light basement setup.  With the average first frost in the region to be around 10/19, I’ve been revisiting the setup and considering what I’m going to be keeping inside overwinter.  And as I pondered the setup, I thought about how much easier things would be if I had a hose connected down there.  And as it just so happens, it’s only about 10 feet away from the main water line.

This portion of the basement is where the laundry machines are hooked up, as well as a utility sink.  The lines split off from here, feeding two external spigots, and there’s the whole house filter, the water heater, and the general myriad of lines for sinks and bathrooms.  To me, the mess of copper looks like the depths of some steampunk facility.

In the chaos, the main water line passes through two spigots.  The spigots are closed, with a central spigot which bypasses them–open.  It looks like a setup for a water softener.  I don’t know if one was ever installed, because the water here doesn’t need conditioning, but maybe it once did.  Who knows?  Regardless their intended purpose, it gave me an idea–could I just simply connect a hose to one of those spigots?

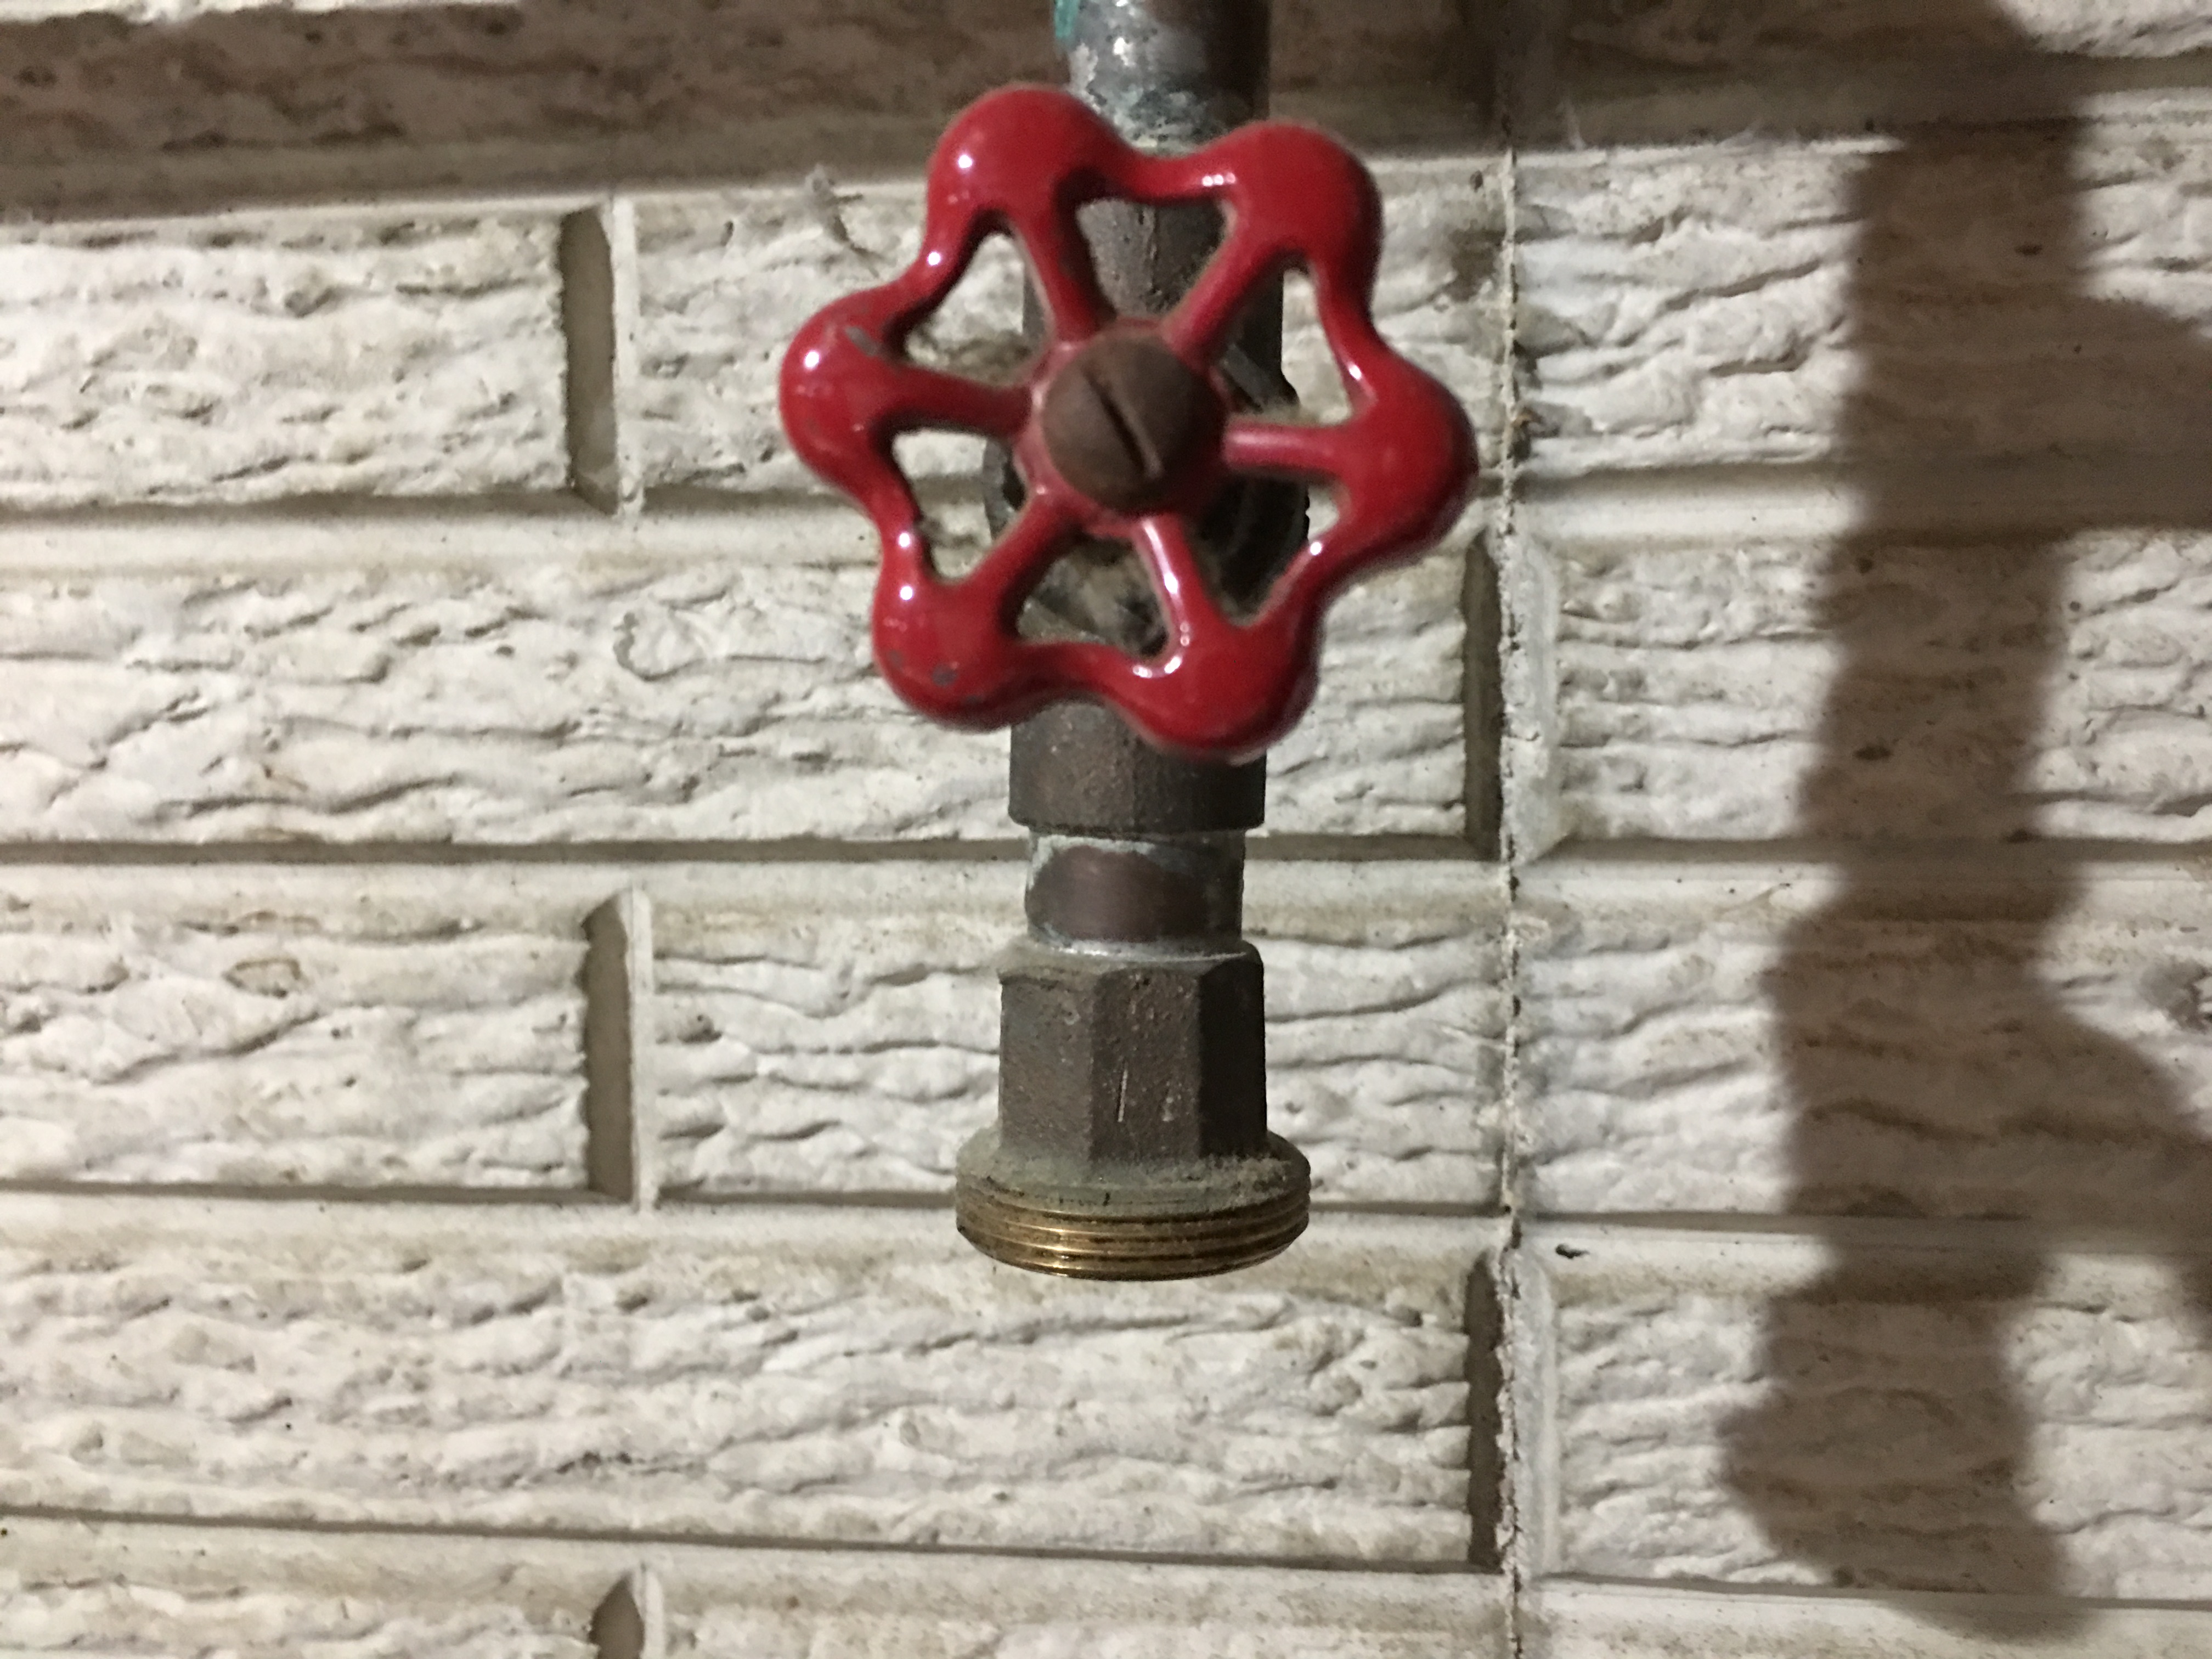
As it turns out, no.  The threads were much too wide for a standard garden hose.  But surely there’s an adapter, right?

Armed with this logic, I was off to Lowe’s to look at copper fittings.  I quickly discovered that the maximum copper fitting size was 1 inch.  Recalling how wide the spigot was, I gambled and bought a 1 inch to 3/4 inch reducer.  I hurried home to see the fruition of my project, but soon determined that 1 inch was too small.  Curious, why would they not make a copper fitting big enough to fit a copper spigot?

So I went to Home Depot instead.  But I ran into the same problem here.  None of the connectors were big enough.  Staring blankly at the wall of copper, a store employee took pity on me and offered to help.  I explained my plight, and he informed me that they don’t carry anything in copper bigger than one inch, but he could get me the needed size connectors in PVC.

I really wanted copper, but this project wasn’t for any high-impact application, so as long as it would work at all, I could live with PVC.  So, with two PVC adapters and a brass threaded hose connector, I headed back home.  I then attempted to attach the PVC to the spigot, and…it was too big.  What the hell?  I went up one standard size from one inch: 1-1/4.  Why wouldn’t that fit?  And it was only slightly too big, like 1/16 of an inch.  Was this spigot metric?

I stewed over this dilemma, and concluded that I would experiment.  So I wrapped the threads in a bunch of Teflon tape to fill the gap, cranked the PVC down, and filled the resultant void (due to the depth of the PVC threads) with a waterproofing adhesive.  I let it cure for 24 hours.  Maybe that would be sufficient.

It wasn’t.  Even though I didn’t turn the water on very high, it was still the main water line, and the pressure was too great.  The joint failed with a pop and I had to scurry over and shut the spigot.  Curses.

Okay, experiment 2.  I removed all the adhesive and Teflon.  This time, I was armed with self-fusing silicone tape–something designed to seal high-pressure pipes (which I bought on a whim while I was returning the first batch of connectors).  I wrapped the spigot threads with enough tape that it became an effort to crank down the PVC connector.  This stuff was supposed to adhere to any surface and be completely waterproof.  I let it sit for a bit, but it didn’t have any cure time so that hardly seemed to matter.  This time, I decided to test it without any sealant, since the sealant itself wouldn’t hold the pressure anyway.  I turned the water on, higher than I had turned it on with my last attempts.

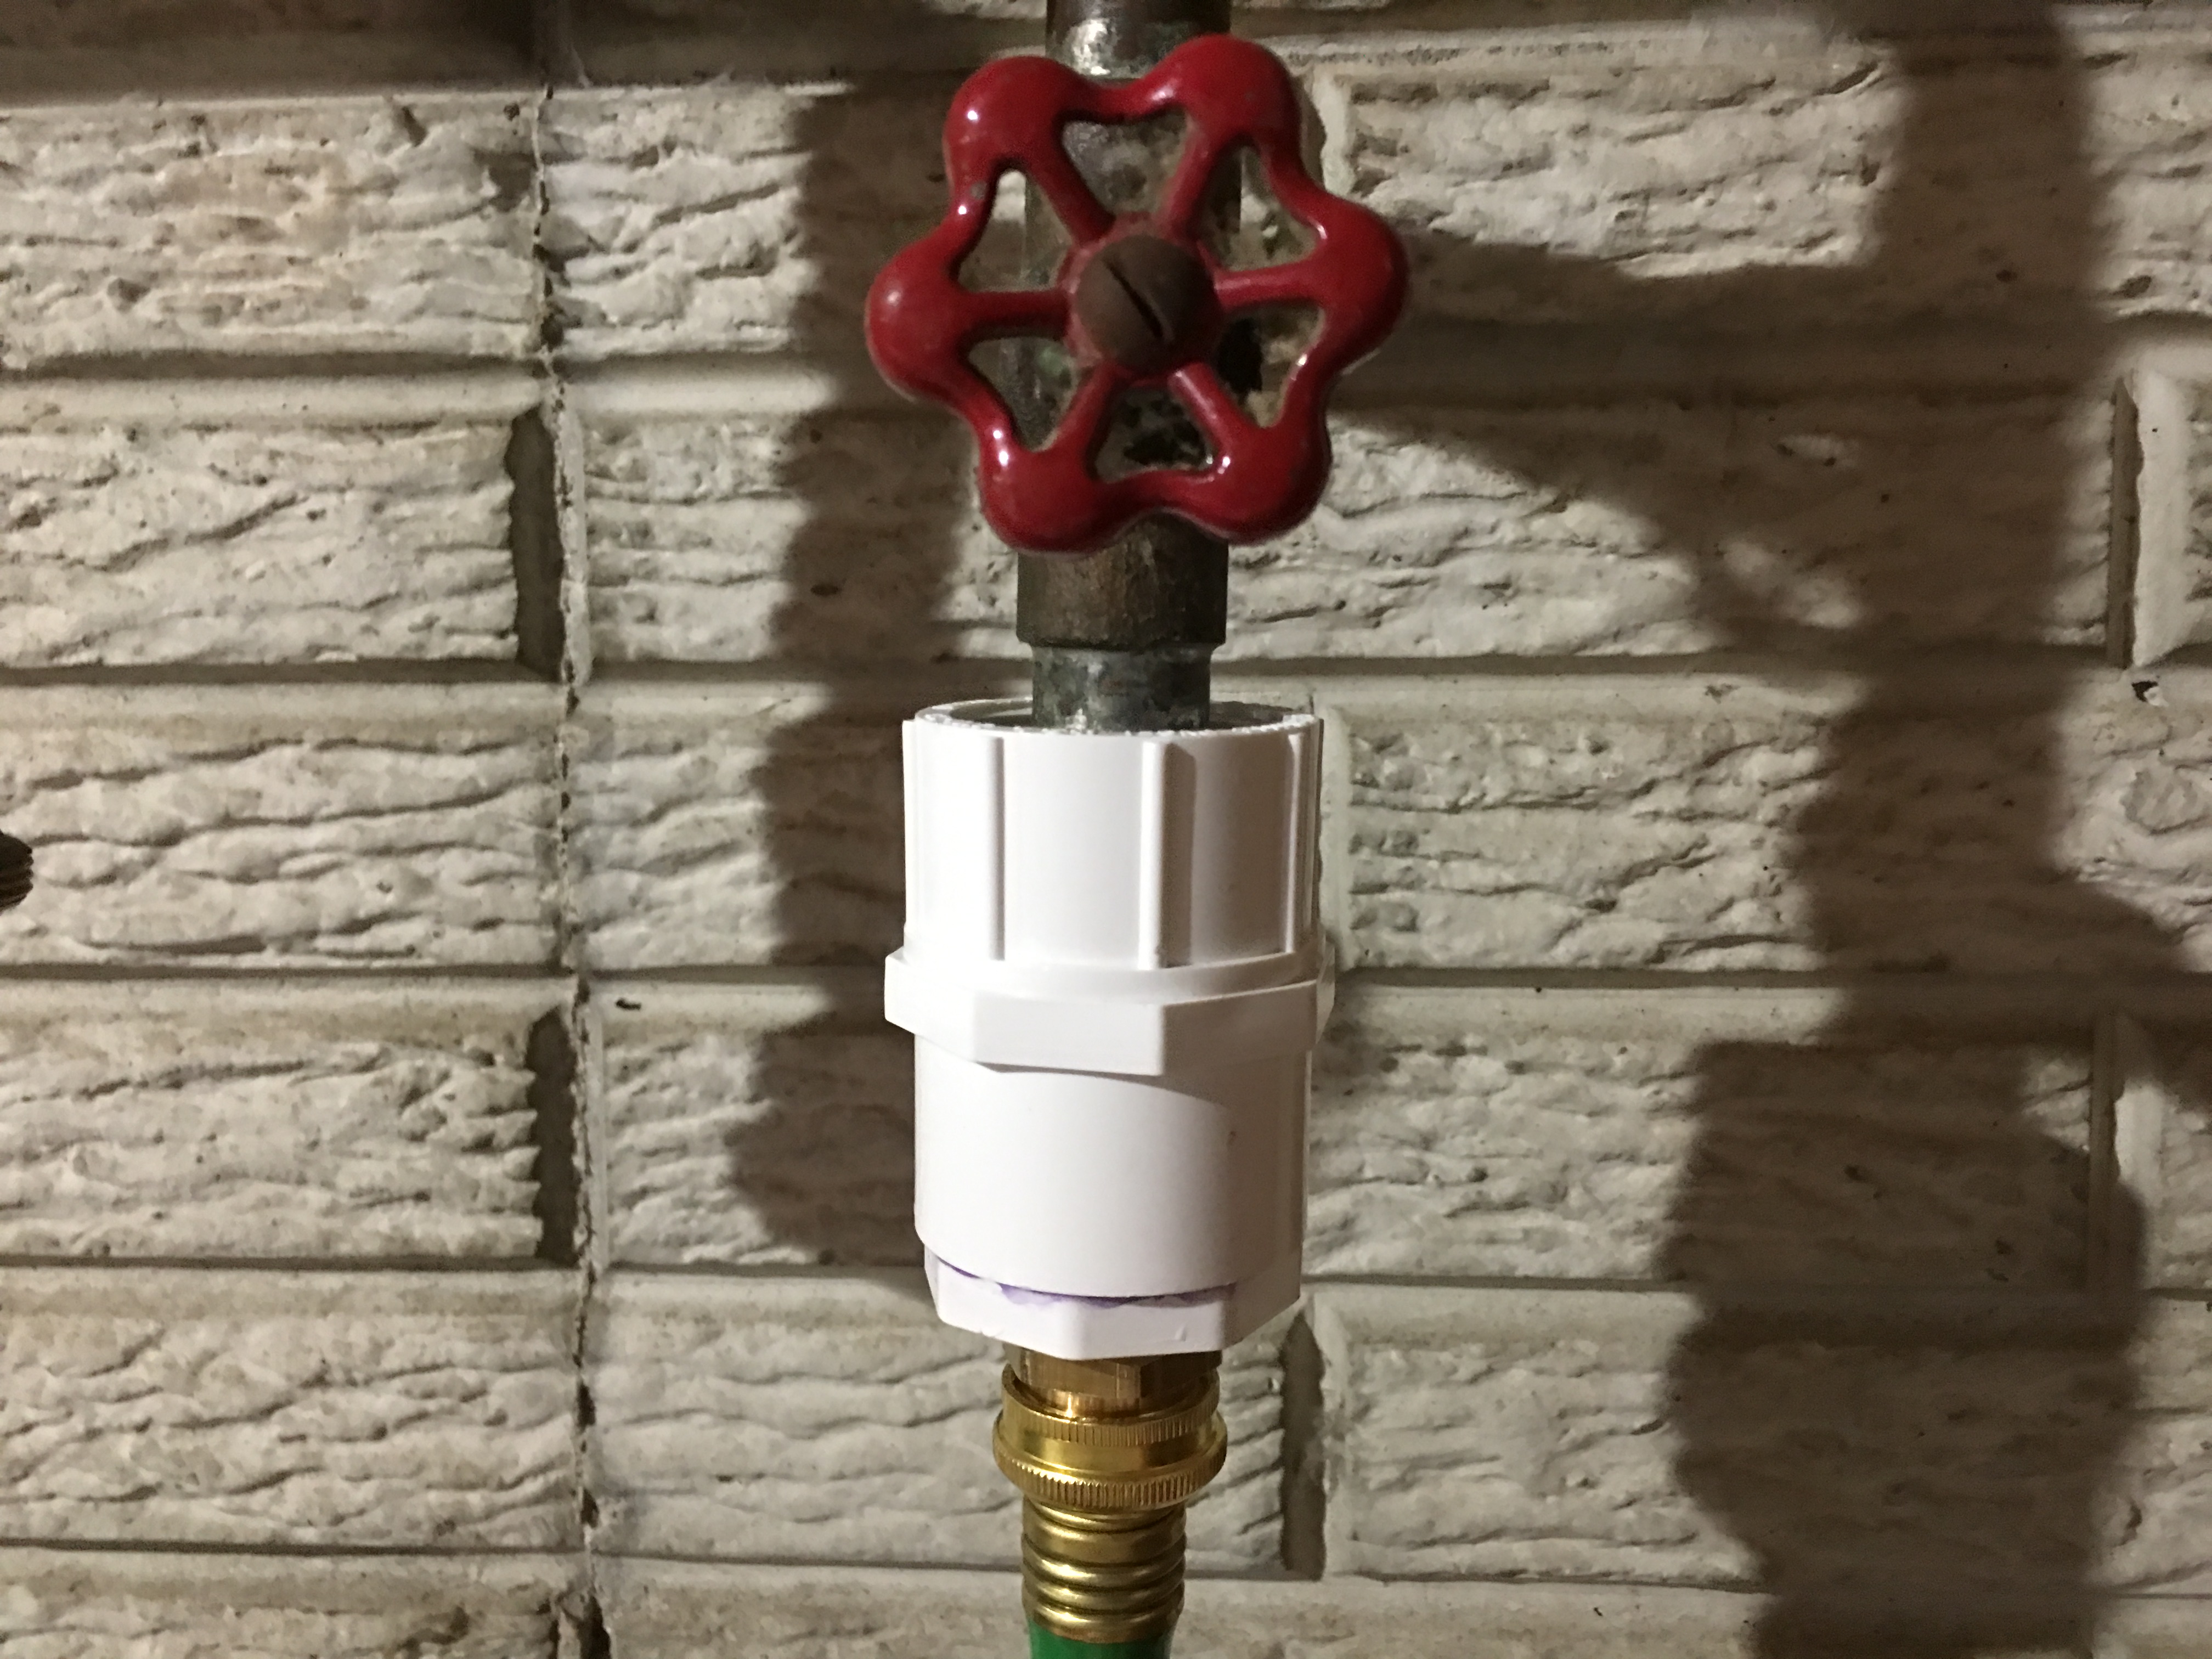
And…it held.  Huh, maybe this silicone tape is magic after all.  I let the hose stay pressurized for a time, then shut it off and de-pressurized the line.  I refilled the gap with sealant, figuring it might still help by adding support.  And so far, it’s working as I had hoped.  I’m uncertain of this solution’s permanence, and somewhat unhappy with the inelegant and hacked solution, but time will tell.  And if it doesn’t hold up, then I’ll simply splice into the wash machine line instead.  I know I can get proper connectors for that at least.

Still, the irritation lingered, and I searched for an explanation.  Curiously, pipe fittings are not nearly as standard as I had thought, and the actual measurements are approximations which have changed over time.  So whenever this spigot was installed, for whatever connection it was intended, is no longer a current standard.  Sheesh.  Maybe one day I’ll try soldering in a nice ball valve threaded for a garden hose, but for now, I don’t want to risk compromising the main water line and having to call in a professional.

Why the hell aren’t pipes all standard sizes?  Another homeowner lesson.

–Simon

Let There be Light

The house has a street light, or it did anyway.  It survived the winter, but shortly thereafter rusted out and ceased to function.  The glass panes had at one point been replaced with ugly plastic cutouts.  The cutouts were never sealed into place, and I was constantly putting them back after the wind would dislodge them.  This no doubt expedited the light’s end, since water was allowed to invade its innards.

I had often wondered why the plastic panes were there to begin with.  I found out during the course of my project when the village elder came over to see what I was doing.  He explained that the panes’ replacement coincided with the delinquent neighbor’s kid’s acquisition of a BB gun.  Lovely.

Regardless, the lamp was in the plans for replacement, as even when it did function, it was still an ugly steel pole whose base had unevenly sunk, causing the setup to lean irritatingly towards the driveway.  It looked pretty bad–bad enough that apparently I never got a good photo.

This is not the boundary to Narnia

And so, armed with shovel and a brief moment of motivation, Liz went out to wage war on the derelict illuminating apparatus.  Then she hit a tree root, got tired, then became disheartened after discovering the lamp was cemented a couple feet down.  It wasn’t good cement, either.  It crumbled upon being struck with the shovel.  So then we had not just an ugly and non-functioning lamp, but now an ugly and non-functioning lamp and a hole.  Liz abandoned the project, which was no doubt her plan all along, leaving me to tackle it on my own.  She also rolled her ankle and collapsed in the yard–something which may have sapped her motivation.

Axe, mattock, shovel, and determination eventually yielded a complete hole around the lamp, but the pole went deep, there was a lot of concrete, and I was wary of severing the electrical line.  Then I examined the pole where it currently protruded from the mass of masonry.  It was really rusted.  I pushed on it and it leaned further.  Then I put my full weight against in and down it went, snapping off at the bottom and preserving the electrical wire–a fortuitous shortcut.

It was at this point that I recounted a discussion we had prior to digging–was the power off?  I recall her saying that it was, but she insisted that she said she didn’t know.  It’s obvious I should have clarified, or at least have gone to check myself, for when I began to wrench the pole free, an exposed and very much energized wire contacted the steel frame.  Now, I had had the good sense to don leather gloves first, which insulated me, but the resultant shower of sparks out the top and into my face was nonetheless disconcerting.  This is when I dropped the pole in a reflexive panic of self-preservation and we had a revisit of the aforementioned conversation.  I then turned off the power, removed the pole, tested the line with a volt meter, and capped the exposed wire.

Then it was off to Lowe’s!  Alas, it was apparently a popular year for street light replacements, as they were completely sold out of the one we wanted.  So it was off instead to Home Depot, who did have a light we liked.

Back home, I pondered the instructions.  I was pleased to see that I would not be required to drill down 3 feet.  Instead, the light came with a simple mount for installing into existing concrete.  Luckily, we had many bags of quickcrete–leftovers from the fencing install.  I poured a new base, effectively raising it to the desired height.  Then I leveled it, and waited overnight (it called for a 4-hour setting time).

The next day, I checked the wire.  This would all be for nothing if the line had gotten damaged.  Fortunately, it was still good.  And so, I assembled the light.  I had to assemble it completely so I knew how to orient the base.  It was slightly off, but that was a minor irritation.  I drilled the mount holes according to the instructions and set the bolts.  Then I attached the pole.  The lamp is top-heavy, and that made me nervous, considering there’s only 3 bolts, using a friction-anchor system, each 3 inches deep.  But I suppose I’ll trust to the light’s engineering.  The top wobbles, but the base is sound.

I also assured Liz that I wouldn’t use white bulbs.  I used 3, 100-watt equivalent 2700K LED bulbs.

It does glow nicely, emulating a vintage street lamp.  And my fears were put at ease when that night a front moved through and hammered the fixture with strong wind and rain.  Hopefully it’ll last for years to come.

–Simon

.30-06

After using the rifle to watch the eclipse, I was left with a nagging sense of incompletion: the rifle still didn’t have a sling.  Here I was feeding my family with a garden, building rain barrels, canning vegetables; and yet–my arsenal still required attention.  I mean, how am I going to fend off zombies/raiders post-apocalypse?

And a ridiculous premise necessitates a ridiculous decision.  Therefore I opted for no mere sling, but one with an integrated bandolier!  That’s right–I’ll need to maximize ammo capacity, or everything I’ve learned from video games is wrong.

Surprisingly, there wasn’t much in the way of rifle sling bandolier options, at least not one meant for actual rifle cartridges.  The majority seemed to be catering to 12 gauges, which admittedly does make more sense.  It’s a lot more likely that one would be firing a lot of shotgun rounds rather than .30-06s.  The latter would generally indicate the user was just a really bad hunter.

But perseverance paid off and I found what I was looking for.  A company named “Big Daddy Holsters” (WTF?) manufactured what I needed, and right here in the US…which seems appropriate.  The Remington 700 is about the most American modern rifle there is, and the .30-06 is undisputedly the most American rifle cartridge ever created, so it would seem a bit of an injustice to outfit it with Chinese parts, regardless of anyone’s political stance on outsourced manufacturing.

Fully loaded, it now carries 28 rounds, which is 7 magazine’s worth.  I opted for 150-grain rounds, mostly because that’s what I had on hand, and partly because if I’ll be fending off humans/desiccated animated husks of humans, larger rounds wouldn’t be necessary.

I’m now incrementally more ready for the end of times.

–Simon

Strawberries

A month ago, we had picked up some old wooden boxes for a strawberry garden.  My own experience with strawberries generally went like this: I would plant some plants, watch hopefully as some berries grew, then collapsed in despair as the day they ripen an insect had beat me to them.  But Liz was hopeful.

And her hopes were not dashed upon the rocks.  This last weekend I was tending to my garden and saw these (tasty):

Aside from the Japanese beetles, the bugs have been rather merciful to our produce.  In light of these successes, garden expansion plans are in discussion.

–Simon

Pickles

This is the Year of the Cucumber.  And because of this bonanza, I needed to do something with all the extras.  One family can only eat so much cucumber salad, after all.

So I thought I’d try making pickles, as I so predicted I would.  Know thyself, I guess.  Anyway, off to the Internet!  Unfortunately, unlike canning tomatoes, pickle-making has a far less unified following.  The USDA, who’s sole mission it seems is to sterilize everything, was not helpful.  If you sterilize a vegetable, as in–boil it for 45 minutes–it becomes mush.  This is fine for tomatoes, but when I tried a similar approach to pickling peppers a few years back, I ended up with a jar of pepper goo.  I therefore sought anecdotal information.

It boiled down (see what I did there?) to two main approaches: a high-temp and short duration treatment, or a lengthy but low-temp treatment.  I opted for the first simply because it’d be a quicker process.

The brine consisted of equal parts cider vinegar and water, with salt, then boiled.  I cut cucumbers into spears, packed two jars, then poured in the boiling brine, then flash-boiled the jars.  I added additional seasoning of dill seed, dill fronds, and crushed red pepper.

Admittedly, I have no idea what I’m doing here, but presumably the brine preserves the cucumbers, which supersedes the need for an extended sterilization process.  I suppose I’ll find out.

[Edit: 2 days later I found out.  Curiosity won out and I opened a jar.  I was very pleased with how they turned out, and the red pepper gives them a nice bite.]

–Simon