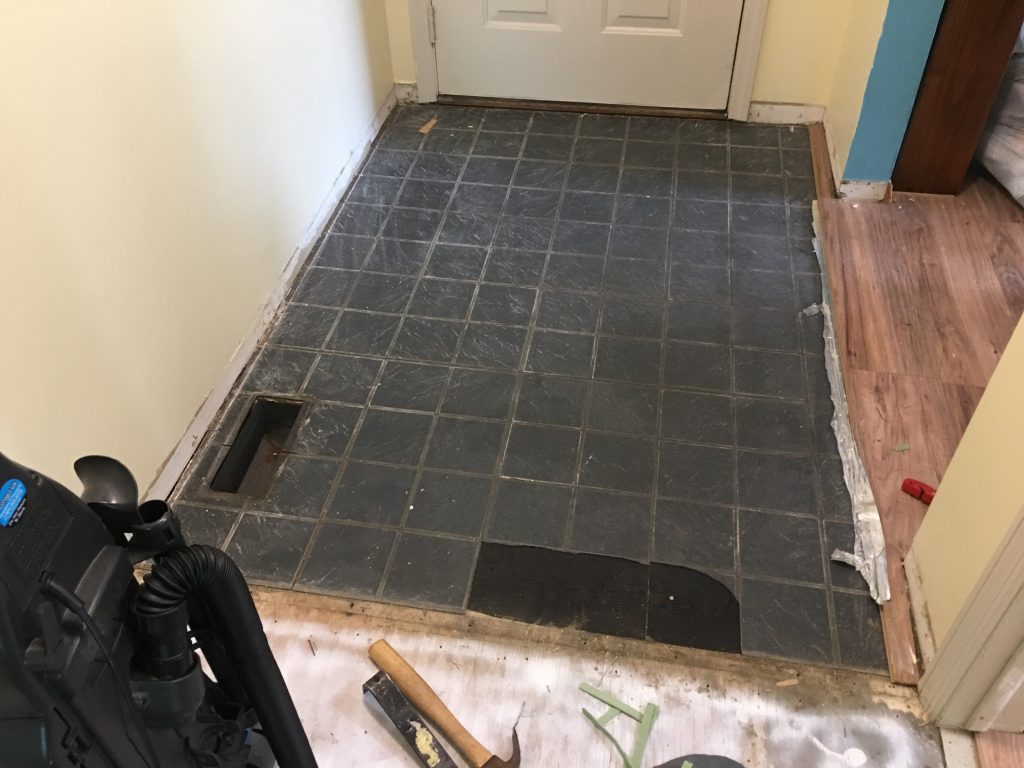
Following the laminate project, a critical area of the floor remained yet to be addressed: the foyer. Until now, it was also laminate–part of the original install (or, the latest install by the former owner), but hadn’t been extended beyond the immediate entryway, the rest being the original carpet which had been removed in aforementioned prior post.
The flooring situation had been a problem in the winter, as there was nowhere to set wet shoes; but more importantly, with the laminate now fully wrapping around the center of the house, for it to be seamless, it would have to match exactly. And I knew from the dining room install that it wasn’t going to be. Therefore, we needed an alternate form of hard flooring for the foyer, and one more appropriate to the type of mess and traffic it would receive. We decided upon tile.
And so beganeth the research–which was inconclusive. No one could agree on the proper method. Was concrete board needed? Was self-leveling sealer needed? How much clearance would the cement require? In the end, an employee at Home Depot gave us a rundown on the proper method (presumably, as I don’t exactly know his level of expertise). And as I suspected, the amount of clearance would be cutting things close. We needed a way to reduce the thickness.
Then we stumbled across this:
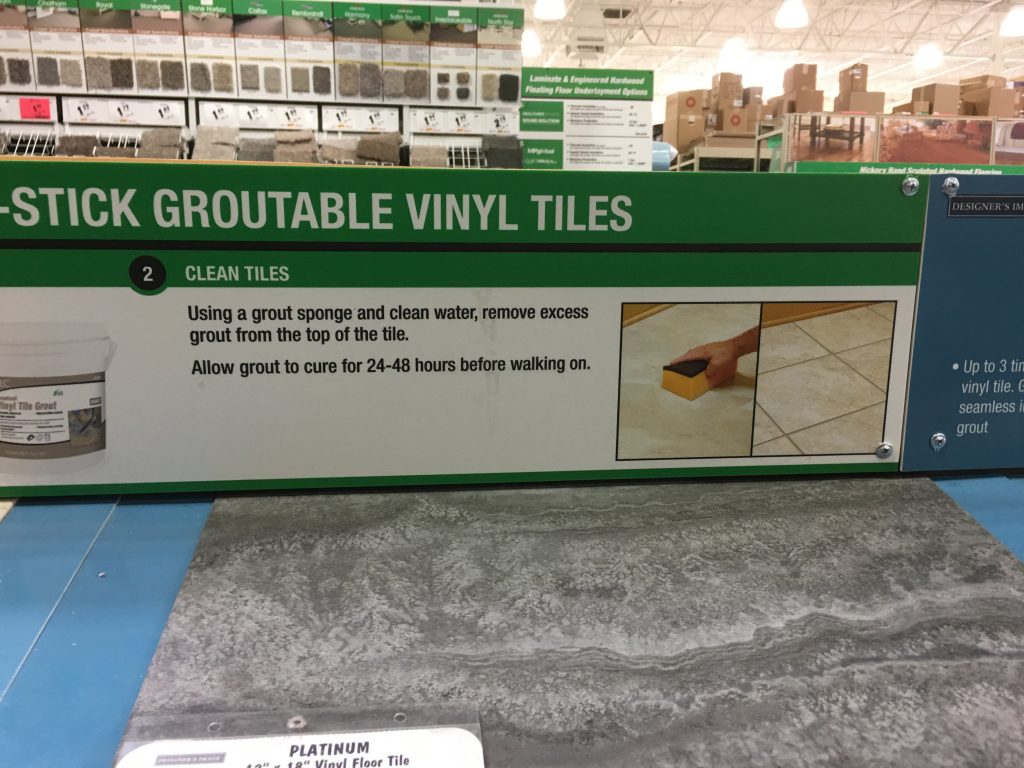
Like laminate, this was a cheat. But was it a tacky cheat, or a convincing cheat? I certainly didn’t want my cheat to be the subject of ridicule as our house’s successors cursed during its removal (mush as I would in regards to whoever installed the flooring I was about to remove). But I also wanted a working solution, and ceramic tile didn’t seem like it would fit the bill. So we gambled, and bought the vinyl.
But first, there was this to contend with.
I should have taken more photos, for that would have better conveyed the experience. Upon removal of the covering laminate, we encountered a sticky rubber tile (for those who’ve worked in food service, it was akin to the texture of those disgusting rollout rubber mats that cover the kitchen floors (and must be cleaned and rolled back up for storage by the busboys each night, I might add)).
But the tiles weren’t the problem. They chipped up easily enough. The problem was the adhesive–a thick goopy tar. And to compound the problem, I opted to use a solvent remover. And the problem with solvents, naturally, is that they dissolve things into liquids. So I had taken a solid goo and liquefied it, resulting in a liquid goo flowing and splashing all over everything in the vicinity. Lovely.
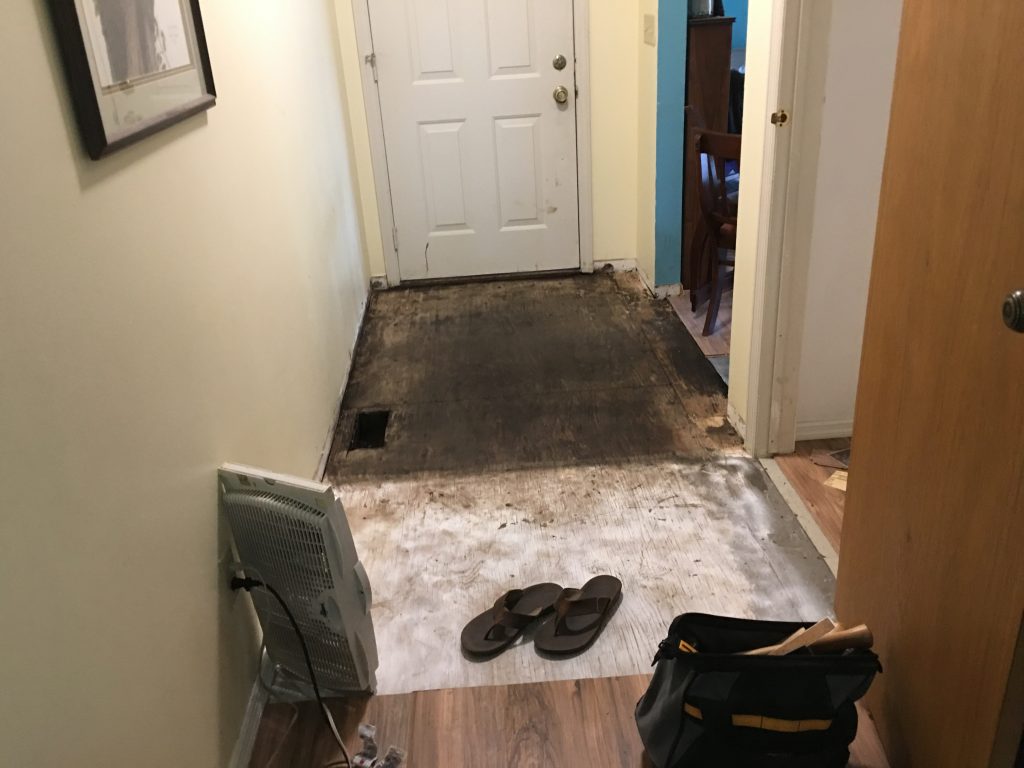
But with enough persistence, and ruined clothing, I managed to remove enough of the adhesive as to be confident that the new tile would lay flat (and actually adhere), though I first left the application of primer to Liz while I had a dozen drinks or so.
Fun part concluded, I aligned and applied the tile, which went off without a hitch (though I was a single tile short and had to send Liz out to the store (the manufacturer’s calculation was almost spot on)).
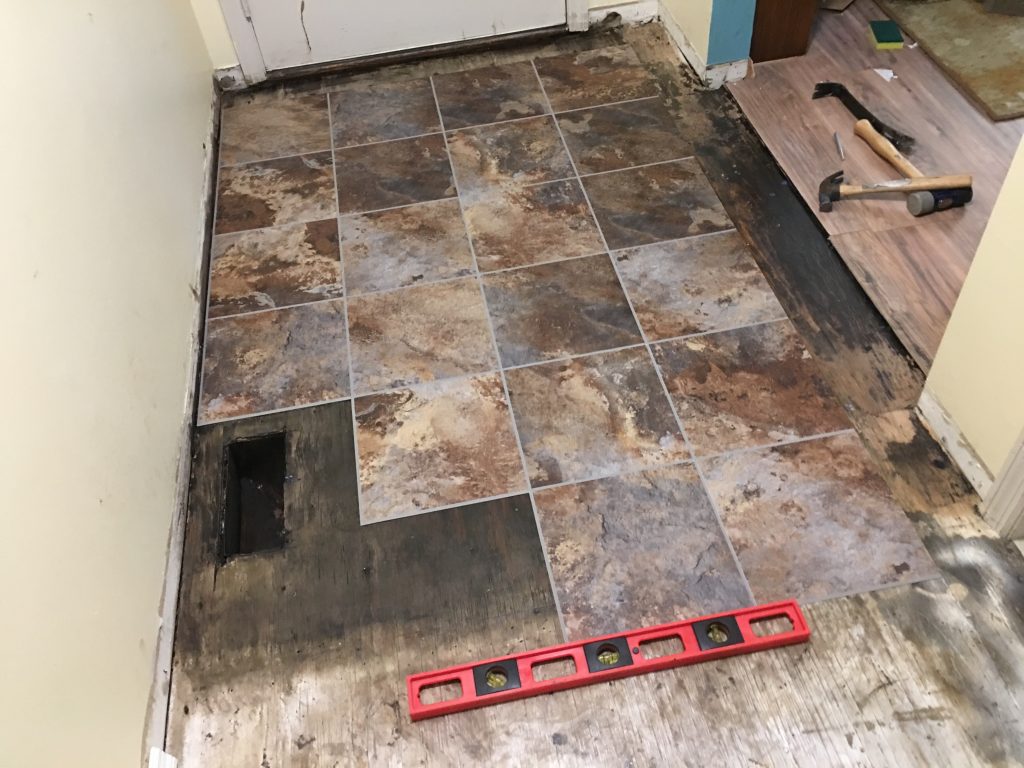
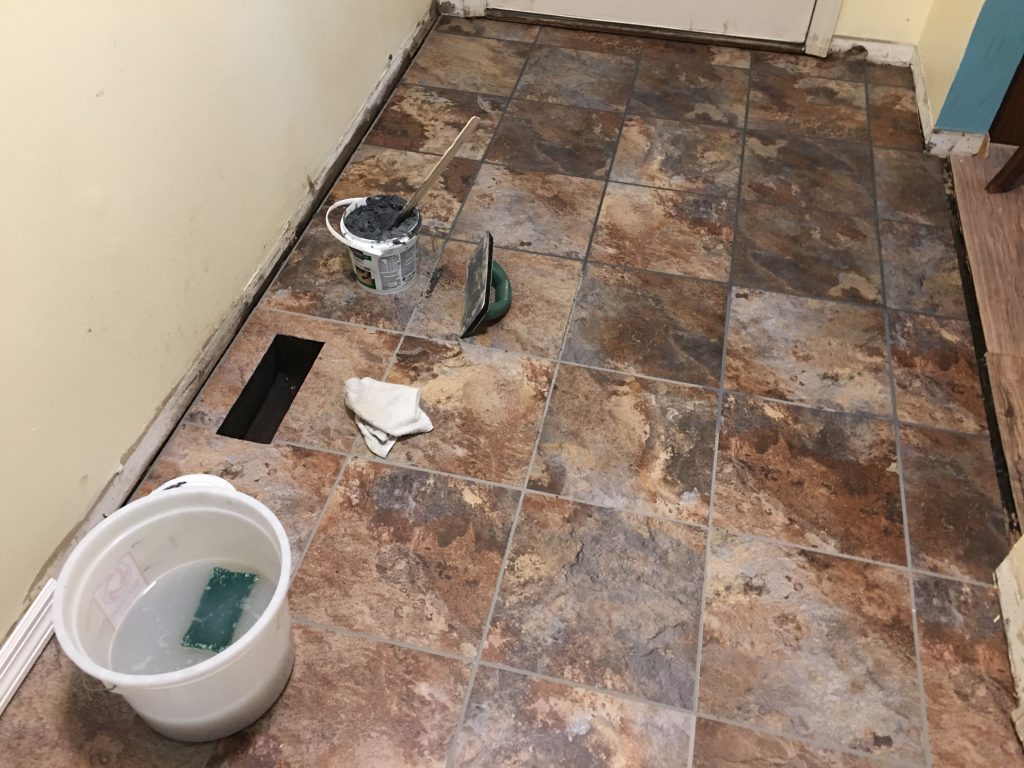
Part of the reason we went with this tile was that it was groutable. The idea being, that it would look more natural and seal better. And it did, ultimately, satisfactorily succeed in both metrics, but first let me chronicle at length the agony that this seemingly simple task inflicted.
Grout is, it seems, little more than premixed concrete. And while it ultimately cures into a binding mortar, in its uncured state it’s little more than grainy mud. This means that it doesn’t really stick to anything, least of all the plastic trenches between the tile. And, since part of the benefit of the vinyl tile was to have a reduced thickness, there was very little depth in which to scrape the grout. The instructions gave a simple account of scooping mortar onto the joint, then scraping off whatever remained on the surface, but in practice, doing so pulled the grout out of the groove, requiring instead a very gentle and meticulous teasing and brushing of the grout. The 40 sq ft room took me 5 hours to grout–7 episodes of Life after People, and more bourbon than I’d care to remember even if I could have remembered after all that bourbon.
Replacing the molding was trivial, as I’ve become very accustomed to the process, so no need to recount it. Here’s the end result:
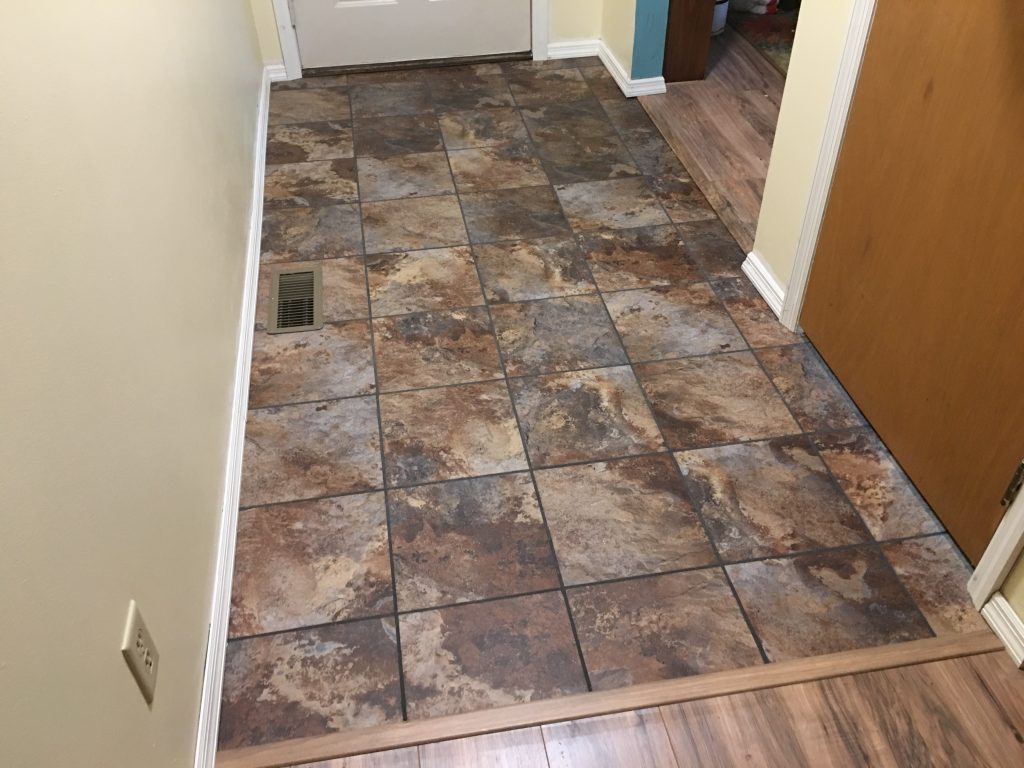
In conclusion, the tile makes for a very convincing facsimile, as does the adjacent laminate. I can’t say from experience if it was any easier, and I don’t know if I learned much during the process as it was the first time I grouted and lacked a frame of reference, but I can say that it was significantly more difficult than I expected.
I’m glad it’s done, and I feel better knowing that the combination of sealants will make for a very water-resistant floor come winter.
Leave your shoes in the foyer.
–Simon